2005 Hemi Dodge Durango Trailer Brake Controller Install (WITHOUT TOW PACKAGE)

"Standard" Wire colors to the controller (Tekonsha and others):
- Black, Battery Positive to controller
- White, Negative Ground for Controller
- Blue, Brake feed from controller to Trailer plug at back of truck
- Red, tap into truck Brake light switch signal to tell controller to apply brakes

Remember, the above colors are just a GUIDE. your colors may be different, read the instructions!

Under the dash, we tapped into brake light switch. We found the white wire with tan tracer came on when we pressed the brake pedal. Also, with a simple twist of the brake switch, it comes loose from the mount and will drop down, making it much easier to reach!

Not shown, but we found a easy spot on a metal bracket and grounded the ground wire under the dash with a sheet metal screw.
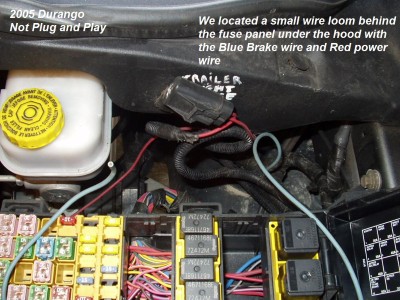
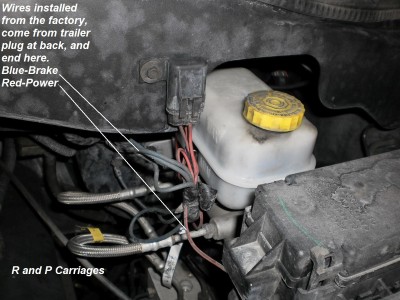
We found the "tow package" on this truck had the blue brake wire, and battery feed wire already ran to the back of the truck, and folded up under the hood. We simply connected the blue wire to the blue wire from the controller, and used the red power wire to power both the trailer plug, and the brake controller (we installed a fuse to protect the controller).

We tapped into the WHITE wire with the TAN tracer for the brake light signal (red wire on the controller). Test to be sure, it must power on when the brake pedal is pushed. (See picture above, under the dash)

Battery feed was taken from the battery feed wire for the trailer plug (under the hood)

The ground wire (WHITE) was grounded under the dash

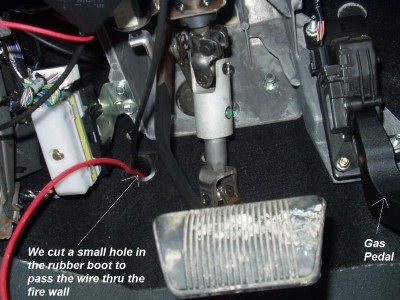
Under the hood, we installed a fuse, to power the controller (running the power into the cabin, though the firewall grommet), connecting to the 10mm nut on the main power stud on the fuse panel The brake feed from the controller will hook to the Blue wire, (which Dodge ran for us), to the back of the truck.